OSD600 – Final Release

For the final release, I decided to stick with Firefox Screenshots. I was still having issues with debugging the extension, so this time I took a different approach. I looked through the solved/closed issues to see if there was any mention of debugging or something that could possibly help me. I stumbled upon a closed issue that used Firefox Nightly to recreate the issue. Maybe if I tried recreating bugs with solved issues, it will help me  with my debugging issue. I felt like I was getting closer to being able to debug the extension, but again, no luck. With all of  these problems and no help from their documentation, I decided that I should document how to install the extension for Linux.

I remember when I first started on this project, it took me about 4 hours to install PostgreSQL and to get the server up and running. Now that I am familiar with PostgreSQL, it took me about 10 mins to uninstall, purge and reinstall it. The installation isn’t too difficult if you know what you are doing. I uninstalled and completely purged PostgreSQL from my laptop. I had to make sure that there was no trace of it left anywhere on my system. I had to kill the open ports, stop the services and then uninstall the program and all of its dependent packages. I reinstalled the database and ran the program. It worked! Now, I had to uninstall and purge again and start documenting.  I think I did this about 5 times before being confident enough to submit a pull request. This was their response:

Screenshot_2018-04-23 Download , Share and Delete buttons do not loose their highlight after each respective action is can[...]

What was frustrating about all of this is that their README only says “Install PostgreSQL”. There are a bunch of additional steps you need to do before getting the server up and running and to get the extension to run on localhost. If there were instructions initially, this would have saved me a lot of time (and tears). I had hoped that with my contribution, I could have help somebody with the installation and with no troubles. I understand where they are coming from, but they should have at least linked PostgresSQL’s instructions some where on their page.

For my second bug fix, I found a CSS issue that causes buttons to remain active, even after being clicked. 30171034-69584802-93f9-11e7-87a1-93d401518abe.gif
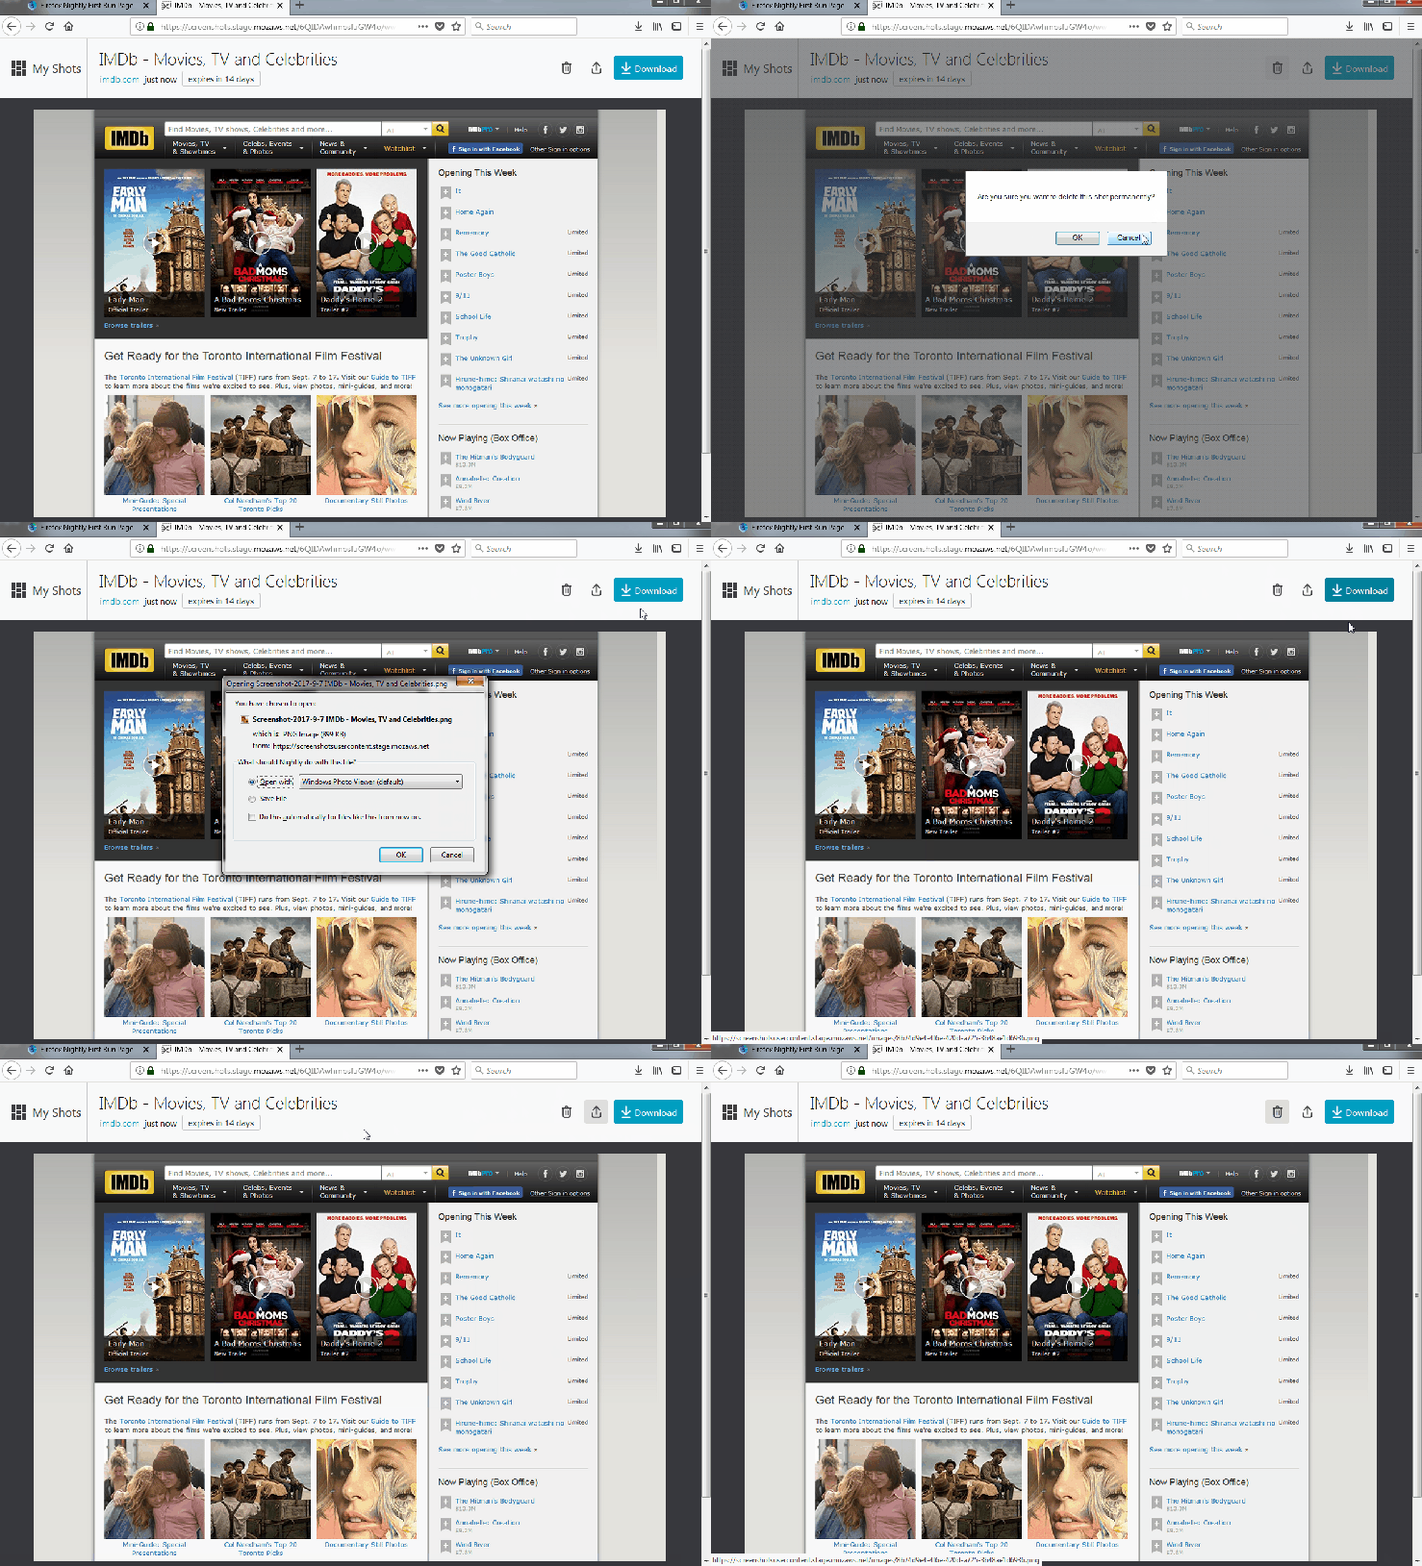
I found this bug quite simple to solve. Now that I am familiar with the code, I located the CSS file that contained the styling for the button. The issue was that the styling for hover and focus were the same. I separated the two attributes and removed the background-color for focus. I kept the border however, so that you can still distinguish if the button is in focus or not. I submitted the pull request with no issues this time and hopefully they accept my code change.

During the last 4 months, I gained first hand experience in the open source world. I was hesitant in the beginning, thinking that this would be to difficult for me. At some point, this was true, but I still tried my best with these assignments. For this last release, I felt like I learned how challenging yet rewarding open source projects can be. This was definitely a learning experience that I can carry forward throughout my career.
 

Lab 6- Brave Browser Bug

This week’s lab we focused on Brave Browser. For this lab, we were required  to fix a bug in Brave using Test Driven Development. This is the first time I have heard of this term, but I am somewhat familiar with the concept. From my understand of it, we need to create tests that would currently fail, and work backwards from there. From these tests, we can code the fix for the bug.

The first step was to build Brave. I had no issues here. The next steps were to recreate the bug. The bug is about how the browser handles URLs. URLs can sometimes be search terms that are used by the default browser. For example, simply typing “dog” into the URL bar will search for “dog” in the search engine. Brave does this as well. The issue arises when you add a space in between words after the search query. Below are the test cases:

  • "dog" - Works as expected
  • " dog "- Works as expected
  • "dog cat"- Works as expected
  • " dog cat "- Works as expected
  • "https://www.google.ca/search?q=dog"- Works as expected
  • " https://www.google.ca/search?q=dog "- Works as expected
  • "https://www.google.ca/search?q=dog cat" - does not work as expected. Instead places the link inside search box.
  • " https://www.google.ca/search?q=dog cat " - does not work as expected. Instead places the link inside search box.
  • "/home/joe/git/browser-laptop/dog cat.txt" - Does not work as expected. Puts this URL inside search engine.
  • " /home/joe/git/browser-laptop/dog cat.txt " - Does not work as expected. Puts this URL inside search engine.
  • "file:///home/joe/git/browser-laptop/dog cat.txt" - Works as expected, but replaces the space with %20.
  • " file:///home/joe/git/browser-laptop/dog cat.txt " - Work as expected, but replaces the space with %20.

The next step was to create tests. I began with testing URLs with space in between words in the search query.  I created the test cases which failed, as expected. I found the function ‘prependScheme’ which deals with the input URL. I tried fixing this function by adding a replace(/\s/g, “%20”), in each of the if statements. This worked for the case that prepends file:/// before the URL. The issue I was having was that I couldn’t debug Brave through VSCode. I couldn’t tell if my changes were being made to the browser. The only way I could test the code changes was to run the test cases again.

The case I was having difficulties fixing was https://www.google.ca/search?q=dog cat. I couldn’t figure out why the code wasn’t replacing the spaces with %20. I tried creating my own if statement inside prependScheme to replace the spaces. It still wouldn’t work. I decided to look elsewhere; I looked for the code that calls prependScheme. In the function getUrlFromInput, it passes input.trim() to prependScheme. However, it doesn’t replace the spaces with %20. I thought this would be a good place to replace the spaces before passing the URL to prependScheme.w

The change seemed to work, as my tests finally passed. However, I still couldn’t see the changes on Brave.

Project Intro – Firefox Screenshots

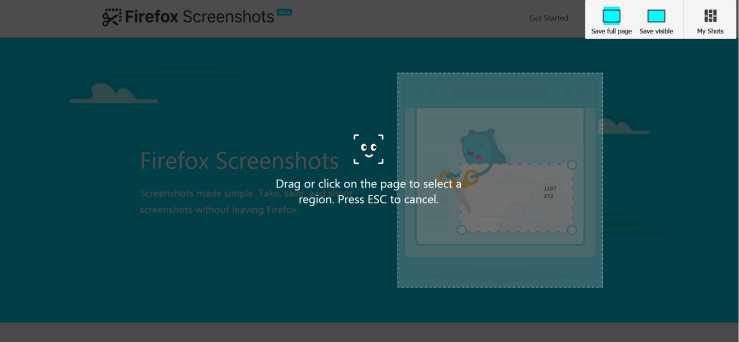
The project that I decided to work on for this release is Firefox Screenshots. Screenshots is a new feature that Mozilla added to their Firefox browser. It is still in beta which means there are quite a few bugs and ‘good first issues’ to solve. I was intrigued by this feature because I’ve never heard of it. Print screening and using the Snipping tool (on Windows) is inconvenient and can be time consuming. Firefox Screenshot allows multiple ways of capturing the page.

  1. Capture parts of the page by clicking on whatever element/container you want to save
  2. Select a region of the page by clicking and dragging the cursor over the area you want
  3. Capture the full page.
  4. Capture only the visible portion of the page.

Once you have selected the image, you can edit, download or share the image.

Screenshot-2018-3-21 Firefox Screenshots

ffss

All of Screenshots’ code and documents can be found on their GitHub repo. This project has about 200 contributors and 75 releases. I found about 29 good first issues that I may be able to work on. Of those 29, there are about 6 defects. I hope to tackle these defects once I get everything up and running. One thing that I noticed is that any localization is managed via Pontoon, not direct pull requests to the repository. I don’t plan on doing any localization but this was something I will keep in mind going forward.

I spent quite some time looking for a project to work on. I found a few interesting ones but I couldn’t solve the bugs. They were either too difficult for me to solve or someone was already working on the bug. I initially tried working on the Brave browser. I am completely unfamiliar with Brave, so the learning curve was steep. I got it up and running but could not figure out how to debug anything. I also tried working on VSCode but I found most of the bugs too difficult for me to solve. I think the majority of the time spent on this release was trying to find a project with solvable bugs. I think I’ve installed around 5 different projects plus their dependencies. I haven’t gotten around to uninstalling them yet, but maybe I will just keep them to remind me of the past frustrations. The next part of the Release can be found here.

ovmasg0cbqm01.jpg

Lab 4 – Contributing to Open Standards

This week’s lab, we discussed Open standards and how to contribute to them.

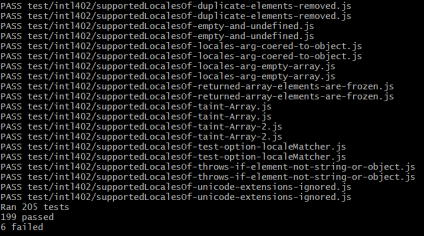
The first thing we had to do was to install the test suite and run the initial tests. I was able to clone the repo and install the program easily. I ran the tests on the command line on Windows 7. The tests were taking quite some time so I decided to read other students blogs just to see if I was on the right track. To my surprise, every blog I read had 199 Passes and few fails. I started panicking thinking that I did something wrong. Luckily, one student mentioned in their blog that you cannot run the tests on Windows command line and to use bash shell instead. I opened up Git Bash and ran the tests again. This time, it took only about 30 seconds to complete. The tests on the command line are still running as I am blogging about this. I am curious to see what the output will be.

test.PNG

The next step is to become familiar with the tests. The tests seem straight forward enough to understand. I’ve never coded in JavaScript before so it was reassuring that the code was intuitive enough for me to understand. The .toUpperCase() tests checks if the .toUpperCase() function works with different combinations of uppercase letters and symbols. Array.reverse() takes the elements in an array and reverses the value at each index. An array [1,2,3,4,5] would be reversed to [5,4,3,2,1].

I’ve added some test cases to check false, Inifinity, NaN, undefined and -1 using S15.4.4.8_A1_T2.js as a reference. I also added a test case to check if the length is preserved using assert.sameValue().

test2.PNG

With this test case, it seems crucial to test as many scenarios as possible because the .reverse() function deals with arrays. Arrays can have various data types and values in each indices. This lab taught me how test cases work in JavaScript. This lab had a lot of firsts for me. This was my first time writing a JavaScipt test, using gist, and analyzing open standard code.

*The tests on Windows command line are still running… after 2 hours.