Part A
Q: What is an alternate approach?
A: An alternate approach is to let the compiler decide which registers to use by not deciding which registers to use.
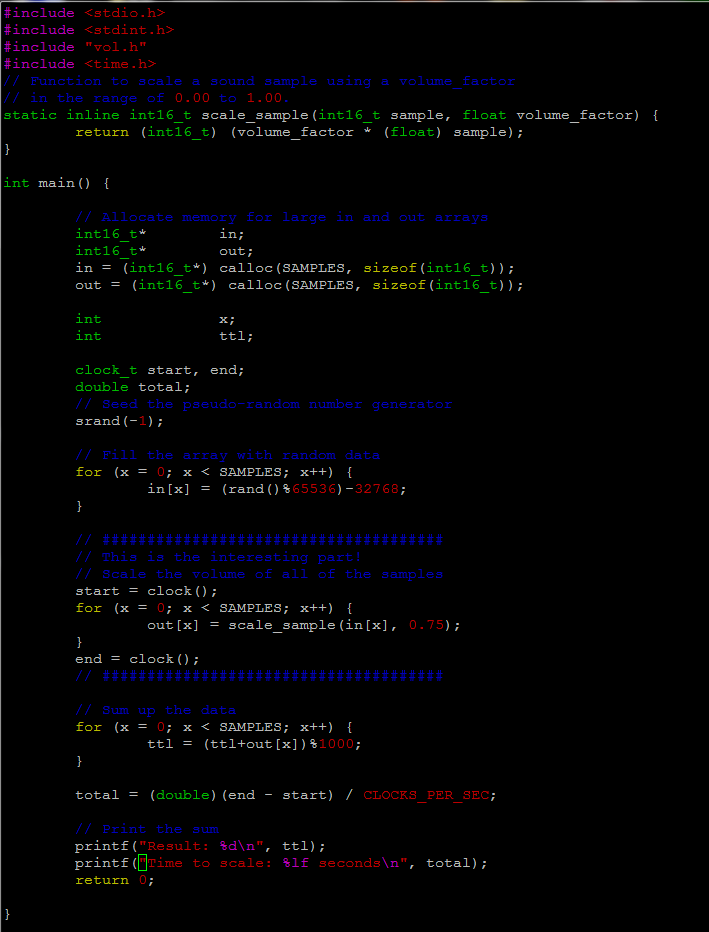
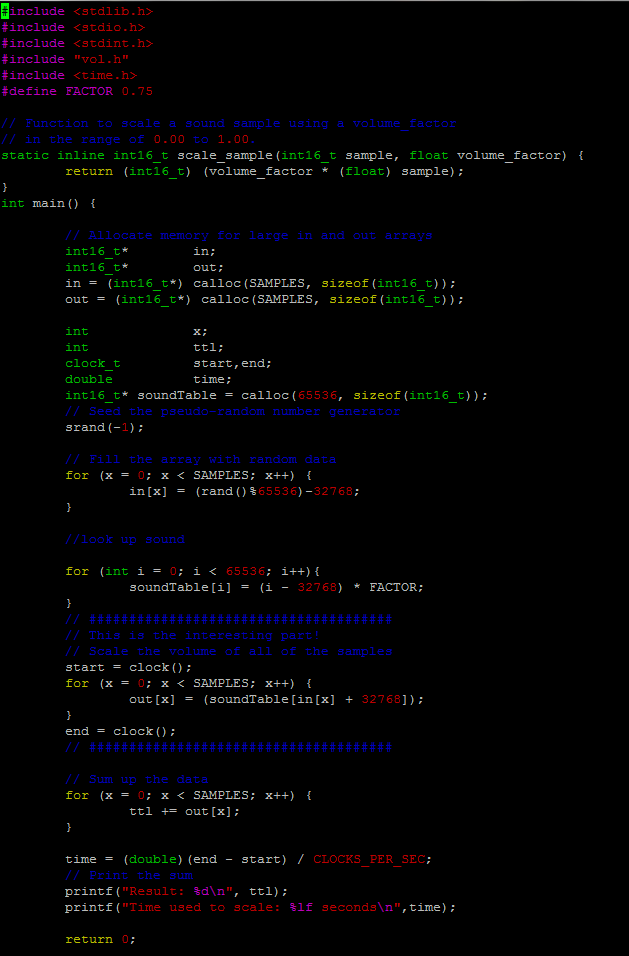
Q: Should we use 32767 or 32768 in next line? why?
A: We should use 32767 because int16_t has a range between -32768 and 32767.
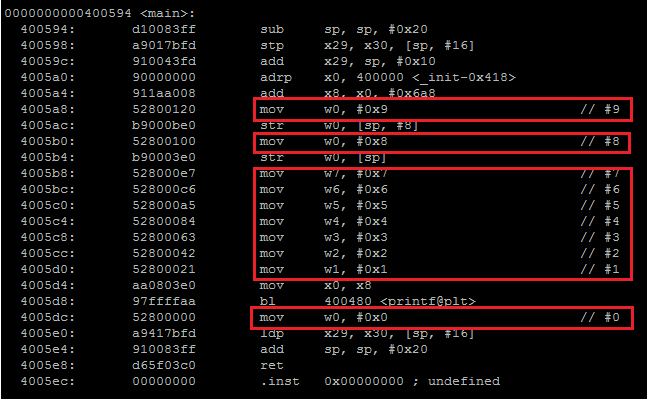
Q: what does it mean to “duplicate” values here?
A: Duplicating value here mean vol_int is duplicated to all 8 vector registers.
Q: what happens if we remove the following lines? Why?
A: If we remove these lines we will get a segmentation fault because the code specifies the input and output operands. Without it, the input and output value can’t be stored anywhere.
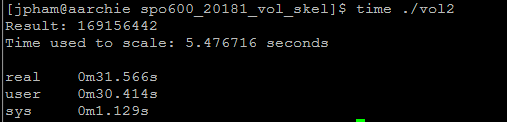
Q: Are the results usable? are they correct?
A: Yes the results are usable and correct.
Part B
The open source package I decided to analyze is OpenBLAS. BLAS stands for Basic Linear Algebra Subprograms. It is the computational kernal in linear algebra or scientific applications. It provides standard interfaces for vector-vector operations, matrix-vector operations and matrix-matrix operations. OpenBLAS is an open source project that uses the BLAS library.
The reason I chose OpenBLAS is because I’ve used the BLAS library in my GPU course so I am familiar with it. I haven’t heard of OpenBLAS before so I decided to learn more about it for this lab.
After spending some time going though their Github repo, I found a folder called “kernel” where they stored code for different architectures. There is quite a bit of assembly language found within this program. I am impressed by all of the different architectures they support. I was able to find a Readme file that lists all of the supported architectures.
2. Supported Architecture
X86 : Pentium3 Katmai
 Coppermine
 Athlon (not well optimized, though)
 PentiumM Banias, Yonah
 Pentium4 Northwood
 Nocona (Prescott)
 Core 2 Woodcrest
 Core 2 Penryn
 Nehalem-EP Corei{3,5,7}
 Atom
 AMD Opteron
 AMD Barlcelona, Shanghai, Istanbul
 VIA NANO

X86_64: Pentium4 Nocona
 Core 2 Woodcrest
 Core 2 Penryn
 Nehalem
 Atom
 AMD Opteron
 AMD Barlcelona, Shanghai, Istanbul
 VIA NANO

IA64 : Itanium2

Alpha : EV4, EV5, EV6

POWER : POWER4
 PPC970/PPC970FX
 PPC970MP
 CELL (PPU only)
 POWER5
 PPC440 (QCDOC)
 PPC440FP2(BG/L)
 POWERPC G4(PPC7450)
 POWER6

SPARC : SPARC IV
 SPARC VI, VII (Fujitsu chip)

MIPS64/32: Sicortex
Most of their assembly code is found in separate .s files. I found 1 instance where they had inline assembly code. It was located in a header file called common_x86.h.
Square root function found in common_x86.h
static __inline long double sqrt_long(long double val) {
#if defined(_MSC_VER) && !defined(__clang__)
return sqrt(val); // not sure if this will use fsqrt
#else
long double result;

__asm__ __volatile__ ("fldt %1\n"
"fsqrt\n"
"fstpt %0\n" : "=m" (result) : "m"(val));
return result;
#endif
}
With all of this assembly code on different architectures, I think the code runs the same or with very little difference, across all platforms. OpenBLAS runs CPU intensive algorithms to solve problems, so their code needs to be efficient and optimized well. For example, running a matrix-matrix multiplication of a matrix that is 1,000,000 by 1,000,000 will need a lot of processing power. By using assembly language to set up the registers and having control of where data is stored, I think this provides a huge increase in performance and decrease in errors and memory leaks. With OpenBLAS, the complexity of the code isn’t much of an issue because it mainly deals with calculating vector and matrix multiplication, which doesn’t really require difficult coding. The main purpose is to run “easy” calculations many times. In terms of it’s portability, OpenBLAS was able to write their code for many different platforms. However, I can see this being an issue if the code is complex and can be difficult to write in different architectures.
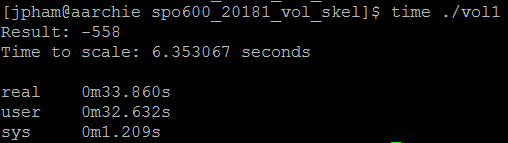
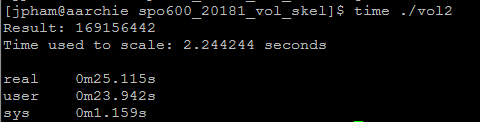


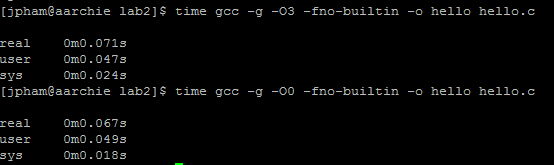
 No optimization
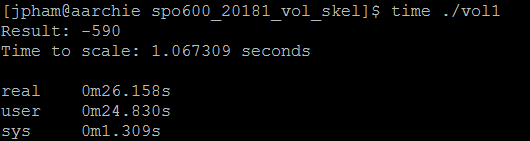
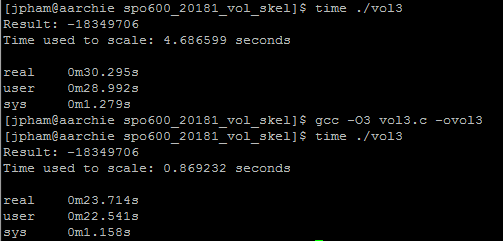
 With optimization